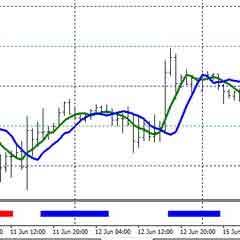
High Accuracy Forex Moving Average Trigger Lines Strategy – To be precise, it stands for Center of Gravity, and the theory basically states that price has a mean average or center of gravity that it always rotates around.
Basically, as price fluctuates up and down, it will come back to its average and return to an appropriate value. When price gets too high, it will come back down and when it gets to low, it will come back up. We can see price do this over and over on our charts and as traders, we are constantly trying to figure out how to capture these swings.
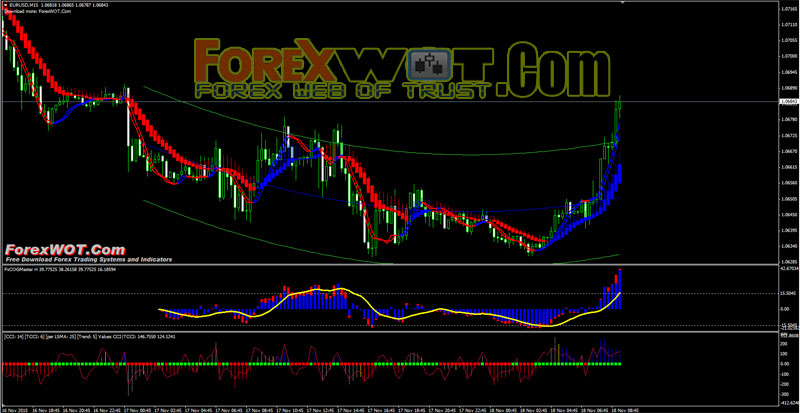
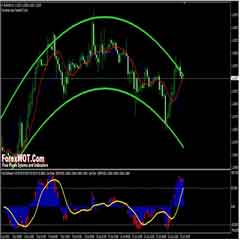
- On the higher time frame (H4), wait for the FxCOGMaster H Histogram and Yellow SMA line to close below the Oversold line.
- On the higher timeframe (H4), confirm that price is at or near the lower Green FxCOGMaster channel line.
- If the above conditions are met, switch to the lower timeframe (H1).
- On the lower timeframe (H1), wait for FxCOGMaster H Histogram to close above the Yellow SMA Signal line.
- On the lower timeframe (H1), wait for price to close above blue TriggerLines and Trend Smoothed indicator.
- Woodies LNX is green.
- If the conditions are met, enter a Buy trade at the open of the next candle.
- Set your Stop Loss below the most recent swing low on the lower timeframe (H1).
- Set your Take Profit the same distance away from the entry level as the stop loss (1:1 risk/reward ratio) or exit the trade manually when price touches the Blue middle FxCOGMaster line or the upper Green FxCOGMaster line.
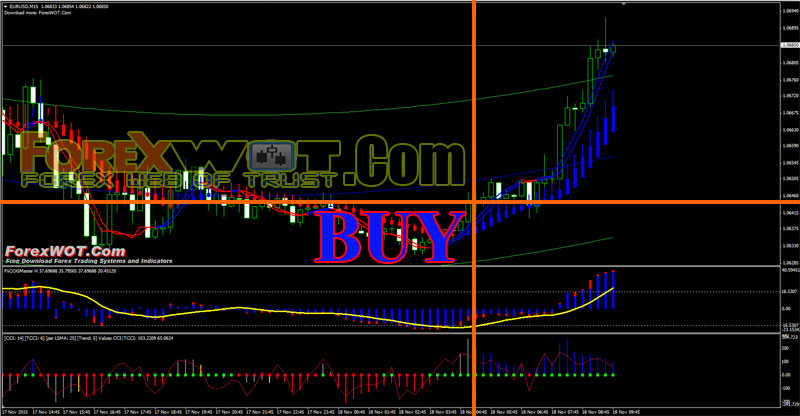
- On the higher time frame (H4), wait for the FxCOGMaster H Histogram and Yellow SMA signal line to close above the Overbought line.
- On the higher timeframe (H4), confirm that price is at or near the upper Green FxCOGMaster channel line.
- If the above conditions are met, switch to the lower timeframe (H1).
- On the lower timeframe (H1), wait for FxCOGMaster H Histogram to close below the Yellow SMA Signal line.
- On the lower timeframe (H1), wait for price to close below above blue TriggerLines and Trend Smoothed indicator.
- Woodies LNX is red.
- If the above conditions are met, enter a Sell trade at the open of the next candle.
- Set your Stop Loss above the most recent swing high on the lower timeframe (H1).
- Set your Take Profit the same distance away from the entry level as the stop loss (1:1 risk/reward ratio) or exit the trade manually when price touches the Blue middle FxCOGMaster line or the lower Green FxCOGMaster line.
We didn’t talk much about money management and stop placement, however, I want to leave you with some personal thoughts regarding those things. As a rule of thumb, don’t risk more than 2-5% of your account on any one trade and only have 1 trade open at a time.
This will reduce the number of losing trades that your account will incur at any one time. Each trade is its own bird so to speak and needs your full attention. You won’t end up having an over-exposed account either.
Imagine having 4-5 open trades at a time with a 5% risk per trade and all of them going bad. That’s a 20-25% loss on your account all at once.
On the flip side, if you only have 1 trade open at a max of 5% risk and it loses then you’ve only lost 5%. For the stop placement we need to put our stops just beyond the most recent swing low or swing high with a target of 1:1 or better.
[sociallocker]
[/sociallocker]
 Forex Trading Short Course – How to Trade Forex with COG Trading Indicators and Strategy
 MA COBRA Forex & Stocks Trading Strategy (Extremely Low Risk High Reward Trading Strategy) (COBRA SYSTEM)
 FOREX 1 MIN Scalping Trading Tricks By The Most Successful Forex Trader
 Forex Profit Matrix – Stay in Strong Trends with the Heiken Ashi Candlestick and Bollinger Band
 2 MACD Effortless Forex & Stocks Swing Trading Strategy
 Complete Guide To Forex Trading : Forex Long Term or Short Term Trading Strategy
 Forex Currency Trading Course : How to Trade Forex Successfully with U-TURN Cross Over Trading System
 Forex and Crypto “MORNING TRADE” Trading Strategy for Advanced Traders
 5 Minute Chart Surefire RSI-CCI Forex Trading System and Strategy
 BEST Professional Renko Channel Forex Trading System & Technical Analysis
